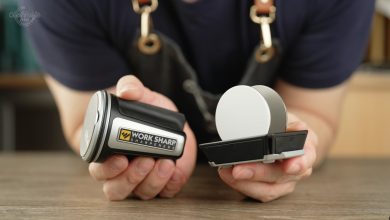
The Horl 2 is a rolling knife sharpener, a simple product to sharpen your kitchen knives. It takes away most of the skill you need to sharpen a knife by simplifying a lot while getting great results.
For whom is the Horl 2 Rolling Sharpener?
Before we talk about the Horl 2 Rolling knife sharpener, let’s make it clear that the product is not for those who already know and achieve great results with hand sharpening. This product is for those who seek similar results without the time and knowledge required for a whetstone.

The state of the kitchen knife is important
The Horl 2 is a great tool to maintain your knife’s sharpness. It is not a tool that can bring back the life of your knife if it has been abused for years or sharpened incorrectly. Such knives might have become too thick, resulting in a knife that loses its sharpness very quickly, no matter how you sharpen it with the Horl. This is because the Horl is not designed to thin out the knife but only to maintain the knife’s cutting edge. The results you get also vary depending on the steel quality of your knife.

Personal Experience with the Horl 2 & Learning Curve
The original Horl instructions in the box were very simple, but I didn’t like them. Horl suggests grinding and honing the same side before moving to the other side, which I disagree with since that suggests that you know exactly how much you have ground away. The time it needs depends on the knife’s condition, according to Horl’s instructions, which is a confusing explanation for those who don’t have prior knowledge of knife sharpening. Ironically, the important part has been missing from the instructions, which have been highlighted as tips on the Horl’s Website.

My instructions for beginners
Since I can’t entirely agree with Horl’s instructions, I will share what I think will yield better results for beginners.
Magnetic Angle Block & What Angle To Use
Let’s start with the magnetic angle block. You have two options: a 15-degree angle or a 20-degree angle. For most kitchen knives, I suggest using the 15-degree angle for a sharper performance. Need a sturdier edge? Go for 20 degrees. If you see microchipping, then you know that the 15-degree edge is not strong enough for your purpose, and you should switch to 20 degrees for a sturdier edge.

Rolling Sharpener and the Standard Included Abrasives
The standard Horl 2 comes with two abrasive sides pre-installed: a coarse and a fine-honing side. You can easily switch the abrasives by holding the rubber ring and then unscrewing the abrasives. When you screw the abrasives back on, make sure they are tight and not loose.

Attaching the Blade to the Magnetic Angle Block
Before attaching the knife to the angle block, inspect your knife’s cutting edge for any damage or dull areas. For knives of 20cm (8 inches) or shorter, attach the magnetic block in the middle of the blade.

If the knife is very narrow, ensure the cutting edge is fully exposed above the angle block.

If the knife is too tall, you can use a cutting board to elevate the rolling sharpener.

Sharpening with the Horl 2
If you are sharpening for the first time, I recommend using the coarsest abrasive, which is the standard included Diamond side on the Horl 2. For some knives, the bolster or handle may come in contact with the abrasives, potentially scratching those parts. Therefore, I recommend that you be extra careful if you notice any of those parts touching the abrasives.

Start Sharpening with the Right Technique
To begin sharpening, roll from heel to tip using light pressure. Ensure that the blade makes contact with the abrasive with each forward and back roll. Count each forward and back roll that you make, as you will need to repeat the same number of passes on the opposite side.

Check for a Burr to Gauge Your Progress
Keep rolling until you have raised a burr along the entire blade edge. A burr is the metal being flipped over to the other side, and you can feel it by running your finger up and away from the cutting edge.

Inspect the entire edge, and once you have an even and consistent burr along the entire cutting edge, you can flip the knife and repeat the same number of passes, but this time from tip to heel.
Honing Step
Refine and Clean Up the Edge
Flip the knife again and start honing on the honing side of the Horl Roller.

The goal here is not to form a burr but to refine and clean up the edge by removing the burr and inconsistencies.
Start with Consistent Passes
I recommend starting with 15 passes. Flip the knife over and repeat with another 15 passes. Feel if there is any burr or inconsistency in the cutting edge on both sides.
Adjust and Perfect
If you still feel some burr but it’s slightly less noticeable, lower the number of passes to 10 and repeat the same steps. Continue lowering and refining the edge until the burr is completely gone on both sides. The more you refine, the better the cutting edge will be.
Finish with Stropping for Best Results
While I do recommend stropping on leather or newspaper with or without compound for optimal results, the Horl 2 does not include a strop with the standard kit.
Final Results of the Horl 2 Standard Kit
Adequate Sharpness for Everyday Use
The final results without a strop were adequate, meaning the knife will be noticeably sharper than before, satisfying for the non-knife enthusiast, and sharper than most factory edges on inexpensive knives.
Comparison to Premium Factory Sharpness
However, the sharpness achieved with the standard Horl 2 kit falls short of the sharpness of premium knife factory edges, leaving me wanting more in terms of sharpness as a knife enthusiast. It’s important to note that this isn’t the product’s target audience.
Add-ons
Horl offers additional products to enhance your sharpening experience, including the extra coarse diamond disk, the upgrade kit, and the Horl Kagami disk.

Extra Coarse Diamond Disk
The extra coarse diamond disk is perfect for first-time sharpening or repairing microchips. Its aggressive grit removes material quickly, making it ideal for addressing microchips or other small edge damages.

Using Higher-Grit Abrasives
For abrasives finer than the honing disk, I recommend repeating the same final step as on the honing disk. Add 10 passes on each side until there is no feelable burr on both sides. If a burr persists, reduce the number of passes on each side until the burr is eliminated before moving to a finer abrasive. The higher or finer the grit abrasives result in a smoother, less toothier sharpness.

Upgrade Kits (Premium set)
The premium set includes #3000 and #6000 grit abrasive disks, with an included leather strop.

This premium set addresses the limitations of the standard Horl 2 kit. The #3000 grit alone significantly improves the results achievable with the standard kit. Meanwhile, the #6000 grit delivers a very satisfying sharpness that will meet the expectations of most knife enthusiasts. The addition of a strop, which is not included in the standard kit, provides a finishing touch to your sharpening session, further enhancing the blade’s edge.

Kagami Abrasive Disk
The Kagami disk is an exceptional addition that will be highly valued by knife and sharpening enthusiasts alike.

When used in combination with all other progression disks, it produces a mirror-like finish on the cutting edge.

Results of all Abrasive Disks
Using all the abrasive progression disks without skipping provides the following results and scratch patterns.

The Kagami disk, as shown, delivers a mirror-like finish, resulting in the smoothest edge possible. For those looking for a more aggressive bite, stopping at a lower grit-rated disk is recommended.

Conclusion: Pros and Cons of the Horl 2 Rolling Knife Sharpener
Pros
- Compact and Easy to Use: The Horl 2 is a compact, user-friendly system that simplifies the knife sharpening process, making it accessible even to those with minimal to no sharpening experience. You only need basic knowledge to use the Horl 2 efficiently, making it ideal for beginners.
- Smooth Rolling Action: The rolling mechanism is very smooth, ensuring consistent sharpening strokes.
- Precision Angles: The magnetic angle block helps maintain precise sharpening angles, improving the consistency of the edge.

Cons
- Needs Elevation for Wider Knives: For wider knives, you may need to raise the roller using a cutting board or other means to ensure proper contact with the blade.

- Risk of Scratching Knife Handles: Some knife handles can be scratched if they come into contact with the rolling abrasive.
- Adjustment for Curved Profiles: Knives with a curved profile require minor adjustments to the rolling motion to achieve even sharpening.

- Potential to Roll Off: The smooth rolling action can be a downside, as the roller might roll off the table if not handled carefully.
- No Roller Holder: There is no holder included for the roller, and due to the abrasive sides you don’t want to scratch the surface of your kitchen with it.
- Premium Price: The Horl 2 comes at a high price point, both for the roller itself and for any add-ons.
- Not Ideal for Knives with Bolsters: Knives with bolsters are not ideal for sharpening with the Horl 2, as the bolster can interfere with the sharpening process.

- You Need to Adjust the Angle Block on Long Knives: Long knives need to be sharpened in sections, requiring you to move the angle block to keep the knife sturdy in its place.
Conclusion
The Horl 2 Rolling Knife Sharpener is an innovative and user-friendly tool that offers great results with minimal skill required. While it has some limitations, particularly for wider knives, knives with bolsters, and adjustments required for curved profiles and long knives, its ease of use and effective sharpening capabilities make it a convenient but expensive solution for maintaining kitchen knives. Given its high price point, it is an investment that requires careful consideration.

🛒SHOP:
Horl 2 Standard Set
Horl 2 Premium Set
Horl Official Amazon Store
Horl Official Website
Horl 2 Extra Coarse Disk
Horl Kagami Disk
▶ If you want to know what knife you should buy you can read
the following article ''Choosing your knife''.

▶ On my youtube channel, I have reviewed a lot of different knives.
You can watch the playlist by clicking here.

▶ Click here, if you want to search for other
kitchen knives on:  Amazon.

▶ , if you want to search for other
Chinese knives on .

▶ Check out my gear on Kit:  https://kit.co/ChefPanko
▶ Check out my recommendation on Amazon:
https://www.amazon.com/shop/chefpanko

Full Disclosure:
If you purchase from these links I get a small commission
that goes towards supporting the channel and website.

As an Amazon Associate, I earn from qualifying purchases

▶ If you have any questions about Japanese knives made in China
or about some of the brands feel free to ask it in the comment section below.

Thank you for your support and feedback.

▶ Want to work with me? Please use the contact form by clicking here.


